Saturday, 8 September 2012

Another one behind me.


   I'm finally finished the Gas Traction Engine Co. Traction Engine (early Big 4) project I started earlier this year. It was another one of those projects that required a lot of upfront preparation before actually doing the work. With being one of the only 3 known to exist, there's not a lot of information available. Another problem was the fact that it was Canadian made, manufactured in Winnipeg, Man. in 1909. The overall restoration took the staff at the Reynold-Alberta Museum10 years to complete. It was restored back to a  fully functional, running piece of  history. It was also interesting to see all the engineering up close that made a piece of machinery like this work With little information, it was quite a challenge to re-create all the graphics. One thing about doing Museum type of work is, you always restore back to how it was, not how you think it should be.

Re-creating the graphics was going to be a big challenge. It started with a trip to the Reynolds-Alberta Museum and meeting with Randy Kvill, the museum curator, and also the person heading up the project. I spent the day looking at photos and some manuals that they had in the museum collection. I then took some photos of  the original rusted out fender, for any traces of the company stencils. I also had some help from other sources that are very good in finding information on these types of things. One source of information is museum libraries, most have an archive that is open to the public. A friend suggested I contact Lindsay Moir, of the Glenbow Musuem in regard to some manuals he had donated years back, he though they might contain some information that would be helpful. In the end, they didn't provide much, but it opened the doors to a new avenue of doing research. Lindsay Moir and her staff from the museum were extremely helpful in pulling the information, and also on how to do searches. The pinstriping on the wheels was pretty straight forward, but the lettering on the fuel tank, radiator and fenders, was a different story. Looking through a number of photos and old manuals, I could make out some of the fonts used, and also that the graphics had been applied by stencil. One thing that helps is to use fonts that would have been used back in that time period. The fender graphics proved to be the biggest challenge, as this early tractor had been made at the factory in Winnipeg, Manitoba. The layout was probably done by their design department, and was hand drawn before being turned into stencils. With the little information that I had, it was time to create layouts that would then be used for patterns.

One of the challenges of the project was to make the lettering look stenciled. This would mean putting breaks in the lettering that would have been used in the actual stencil making process. The second problem was to transfer the layout to the actual surface being lettered. To do this I prepared pounce patterns ( paper patterns, perforated with tiny holes), and then using white chalk to transfer the image to the surface. If your not sure what I mean, you can read my post from last year  explaining the process ( look under Older Post). Once I had the layout transferred, I taped off the tops and bottoms of certain letters, also the stencil break lines. Although I could do the lettering without taping, I find using tape produces a far better quality job, and saves time. One of the problems when using tape to re-produce a stencil break is it slows down the painting. When painting a letter without the stencil break, it's a fluid motion. With a break, you have to stop and clean up the line where ever the tape is. Also the color being used was a yellow, which is well know for being transparent. This meant everything had to be second coated. Back when I first started painting signs, the paint used for signs had lead in it. This allowed for far better coverage, and also made the paint last. But  around 10 years ago, they  removed the Lead and changed the formula. This has created issues with both coverage and longevity. Most of the work would have to be done from a ladder, or sitting in an uncomfortable position for a period of time. I'm now in my fifty's, so doing this for any period of time takes its tole on my body and feet, ah...the pleasures of getting old. The lettering and striping took around six days to complete, the research took more time than I would like to think about. Overall, it was a very challenging project to work on. But in the end, the results were well worth effort. Here's some photos of the job in progress. Thanks for taking the time to check it out. Feel free to comment or contact me if you have any questions.


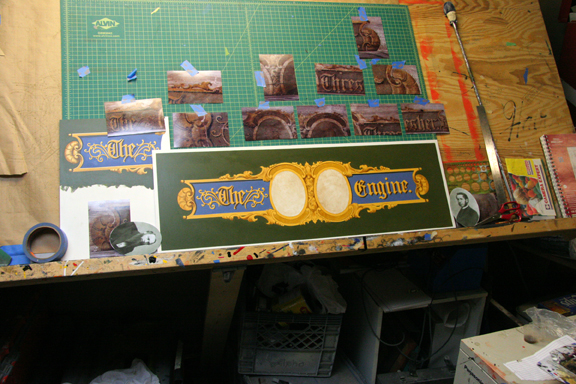
This is how most of my projects start. A few photos, and a lot of research. I find this part of the project to be one of the more interesting parts of the project. You basically become a history detective. This is the part where it helps to have a good group of  people that can help point you in the right direction. I've had the good fortune to know some very knowledgeable people that share information freely. Without them, I couldn't do this type of work.


Usually the reference material is vague, but at least enough to get a start. I spend a lot of time looking through books and cruising the internet. The internet has been such a valuable tool when it comes to this type of work. If you want to get into this line of work, I highly recommend developing you internet search skills.
   

The engine used two different types of radiators,
but the lettering was the same on both. The problem with working from old  black and white photos, is you can only guess at the colors. Also, a lot of old photos have been retouched, making them not overly accurate when it comes to details


The graphics on the rear fender proved to be the most challenging part of the job. Because this tractor had been produced in Canada, there was no pictures available,  that we knew of. The only information we had was an original fender that had long since given up it's information. It would take a little coaxing, and a lot of luck, to try and salvage any imaging that may have been there. Here's a few photos of the steps we took to try and see the image. First, we sprayed some water over the fender, this helped a little.


Here we're starting to getting a little more by applying wax over the lettering ( this was Randy's idea). It brought it out a bit, but was still quite vague. Just not enough to work with. You could only see a couple of the letters. The one thing you have to careful with is, you don't destroy what little you have. You could always just make it up due to lack of information. But that would be taking the easy way out. "No Pain...No Gain"


 I decided to try a few more things. At times, I thought I had lost it. But then I got lucky, I managed to get the ghosted lettering to a point I could finally get some good information. Sometimes you just luck out. I was now setup to create a layout from which I could then make a pattern. After sketching a rough layout, I scanned it into computer, and then created a vector file. Once I had a vector file, I created my pattern.


This is a copy of the finished vector file. It didn't have to be perfect because I was only making my pounce pattern. I could easily clean up any discrepancies when I do the lettering. One of the things we noticed, was the use of 2 different "N" styles. Not sure why they would do this. But I'm sure they had a reason.

The finished lettering


 The next step was to apply the patterns to the radiator for the lettering. From what I could see in the reference photos, they moved the stencils to the sides of the straps, so the lettering would be visible and not under the tank straps. I guess it made it easy for the people working on the assemble line, and kept it legible at the same time.

 With the patterns in place, it was time to do the transfer.. To do this, I create a pouch from a rag filled with white chalk, then pat and rub it over the pattern. This  pushes the chalk through the perforated holes, you then end up with the layout transferred to the surface. Once you have the layout transferred, you have to be careful not to accidentaly wipe it of. otherwise you have to pounce it again. If you've already started the lettering, you'll have to wait until the paint has dried to re-pounce the layout. Not to mention wasting time.


 With the layout done, it's time to tape the edges, and get on with the lettering. When applying the tape, take some time to plan it out. It will help when you have to remove the tape as you paint. I usually do all the taped letters fist, then come back and do the rounded letters such as O /C /S/ U, that go above and below the horizontal guild lines. Everyone does things a little different, this is the way that works best for me.


 Now, the fun begins, I actually get to paint. I tell people this is the easiest part of the job. You can see how sharp the edges are. This is the advantage of using tape. Although the original would have been stenciled, hand lettering the graphics produces a very clean, finished product. I'm sure the lettering never looked this good coming off the factory floor. Because this machine will be on display, it pays to spent  time to making  the best it can be.


The finished lettering

The finished machine

Saturday, 18 August 2012

The 1909 Gas Traction Engine project

Just returned from working on a 1909 Gas Traction Company tractor at the Reynolds -Alberta Museum in Wetaskiwin, Alberta. Myself and a good friend Bruce Ander spent 3 days re-creating the lettering, striping and high-lighting the cast letters, back to the way it rolled out of the factory in 1909. This was another one of those jobs that required a lot of research and a little guessing as to how they would of been done. The problems with working from photos from that period, is most have been retouched in one form or another. The other problem is they usually show the equipment from a distance, or from the wrong angle. I've also included a picture of the fender that has traces of the original lettering, but is almost non-existent. We managed to get a lot done, and will finish up the lettering on the radiator and fenders next week. Although we'll be hand painting the lettering, they'll have a stenciled look that was used from the factory.  I've also included a few photos of other tractors that are part of their collection. If you ever get a chance, make sure to drop by the museum. They have a wonderful collection.


Tuesday, 7 August 2012

Aultman Taylor decal project nearing the end.

Just a quick update on the Aultman Taylor decal project. Some of you may remember when I first started the project,  how little I had to go on. Fast forward to today, and you can see the almost finished design. I hand painted the master artwork to a stage where it could be scanned into the computer, and then will finish up using Photoshop and Illustrator. The finished piece will then be digitally printed to create decals, instead of the traditional way of silkscreen and die cutting, that used back in the day. This has been a very detail orientated project, testing both my brush skills, and also my computer skills. I believe you have to be able to master both skill sets to survive in doing this type of work. The nice thing about using the computer, is how much flexibility you have in making changes and tweaks, not to mention, not having to wait for the paint to dry. Here's a few updated pictures of the project. I'll be doing a full re-cap of the entire project in the near future, including a pictures of the finished decal, applied to the tractor. Thanks for dropping in. Funny, when I was a kid, I use to get in a lot of trouble for drawing on my friends wall and whatever I could find, now I get paid for it. Who would have know.


Sunday, 29 July 2012

Just returned from a road trip

 I just got back from a seven-day bike trip down into the states. Our route took us through a number of small towns in Montana / Idaho / Oregon and Washington. It seemed each town had its own character, mostly due to the architecture and of course, the signs. There were so many different styles and types of signs in these towns, that you could only imagine how many generations of local sign painters had plied their trade to the walls, windows and such over the years. Because I was riding with a group, it was hard to stop and take pictures without falling behind the pack. I think I'll plan a ride by myself, or with someone who also shares my interests, so I can explore and document all the visual eye-candy these little gems of towns have to offer. A lot of the towns seemed to have been founded in the late 1800 or early 1900, so you can imagine the sign work that had been done over the years. I was also surprised to see how many of these small towns seemed to be turning into ghost towns, so many vacant or boarded up shops on their main streets. I'm sure they were bustling little centers in their day, but with the closing of a factory or plant, or the Interstate that was built with no exit to the town, had fallen into despair, and would eventual die. Riding though cottage country and the tourist areas around the many lakes, I couldn't help to notice that a lot of the road side signs were still hand painted, your can tell them by their layouts and flair. I'm sorry I didn't have more time to take pictures, but at least I managed to get a few. If your interested in checking out the bike trip I was on, you can follow the link to: http://pcacanada.blogspot.ca/ to see the trip blog and photos. Thanks for dropping in.