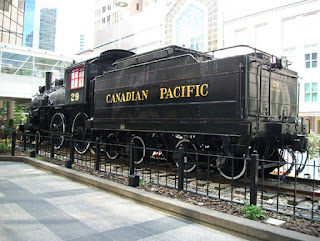
Just finished a interesting job this week. I was approached to do the lettering on a A1e No. 4-4-0 class locomotive that was in the process of being restored by CP (Canadian Pacific). It's a static display in front of the Gulf Canada Square office towers downtown Calgary. At first I was asked to prepare a budget to re-create the layout and then hand letter the engine and tender car. They then also requested I quote the job using vinyl. Not my preferred way to do the job but that's what the client requested. In the end, they decided to use vinyl to due to the budget. A big part of the job was going to be digitizing the lettering and numbers back to the Canadian Pacific lettering specs so they could be cut in vinyl. The engine and tender had been done previously with the wrong font and color (also done with vinyl). With the help of a few close friends, I was supplied with photos and the information needed to re-create the lettering and numbers. Now it was time to get down to doing the digitizing of the lettering and numbers. There are no digital files available of the font and number that I know of, so it had to be re-created letter by letter. Over the years, I've created quite a collection of patterns and layout for engines / passenger cars/ cabooses and working cars. All of the other restorations jobs I've been involved with were done by hand, both layouts and lettering. This would be the first vinyl job, so a digital file would be needed. The interesting thing is, if done right, it's hard to tell it's vinyl from 20' away, plus your not on site near as long. Here's a few photos of the #29 back in the day..
Now that I had the lettering and number diagrams, it was time to start digitizing. The first step was to scan the letters and numbers, then create a vector image. I used Adobe Illustrator and Flexi Sign software to do the digitizing work.
After spending hours in front of the computer rebuilding the letters and numbers, I had my file. The next step was to cut the vinyl and do the install. Because I was fourtunate to have factory specs for placement and size, it saved time by not having to count the rivets from old photos, which is what I would done on previous jobs. The only thing the specs didn't provide, was the kerning (space between the letters) for the lettering. All they gave me were the overall sizes. Now that that part of the job was over, it was time for the install. With the help of my friend Joe Mattatall, we installed the graphics on the engine and tender. The install took 4 hrs. to complete, not including travel time. It would have been nice to have hand lettered the job, but it all comes down to money, you either accept the customers request, or you don't get the job, plain and simple.. Hope you enjoy the post as much as I enjoyed doing the work. Thanks for taking the time to drop by. Comments are always appreciated. Watch for my next project, I think you'll find it to be quite interesting.


No comments:
Post a Comment
Feel free to leave a comment or suggestion